Sharp R-95STM Dokumentacja Strona 37
- Strona / 91
- Spis treści
- BOOKMARKI
- 1
- Information on this manual 3
- I. Orientation 4
- III. Legend 5
- IV. Target Group 5
- Table of contents 6
- 1.0 Safety regulations 10
- 2.0 Introduction 11
- 3.0 General information 12
- 3.4 Troubleshooting 13
- 3.5 Installation 13
- 3.6 Initialization 14
- 4.1 Connection to a PC 15
- fig. 3: 16
- fig. 2: 16
- Computer-controlled functions 17
- 4.3 Machine orientation 18
- 4.4 Displays and connections 19
- ProtoMat 95s/II 20
- 5.0 Setup 25
- 5.3 Preparing the tools 28
- fig. 19: 32
- 5.4 After switching on 33
- fig. 20: 34
- fig. 21: 36
- fig. 22: 36
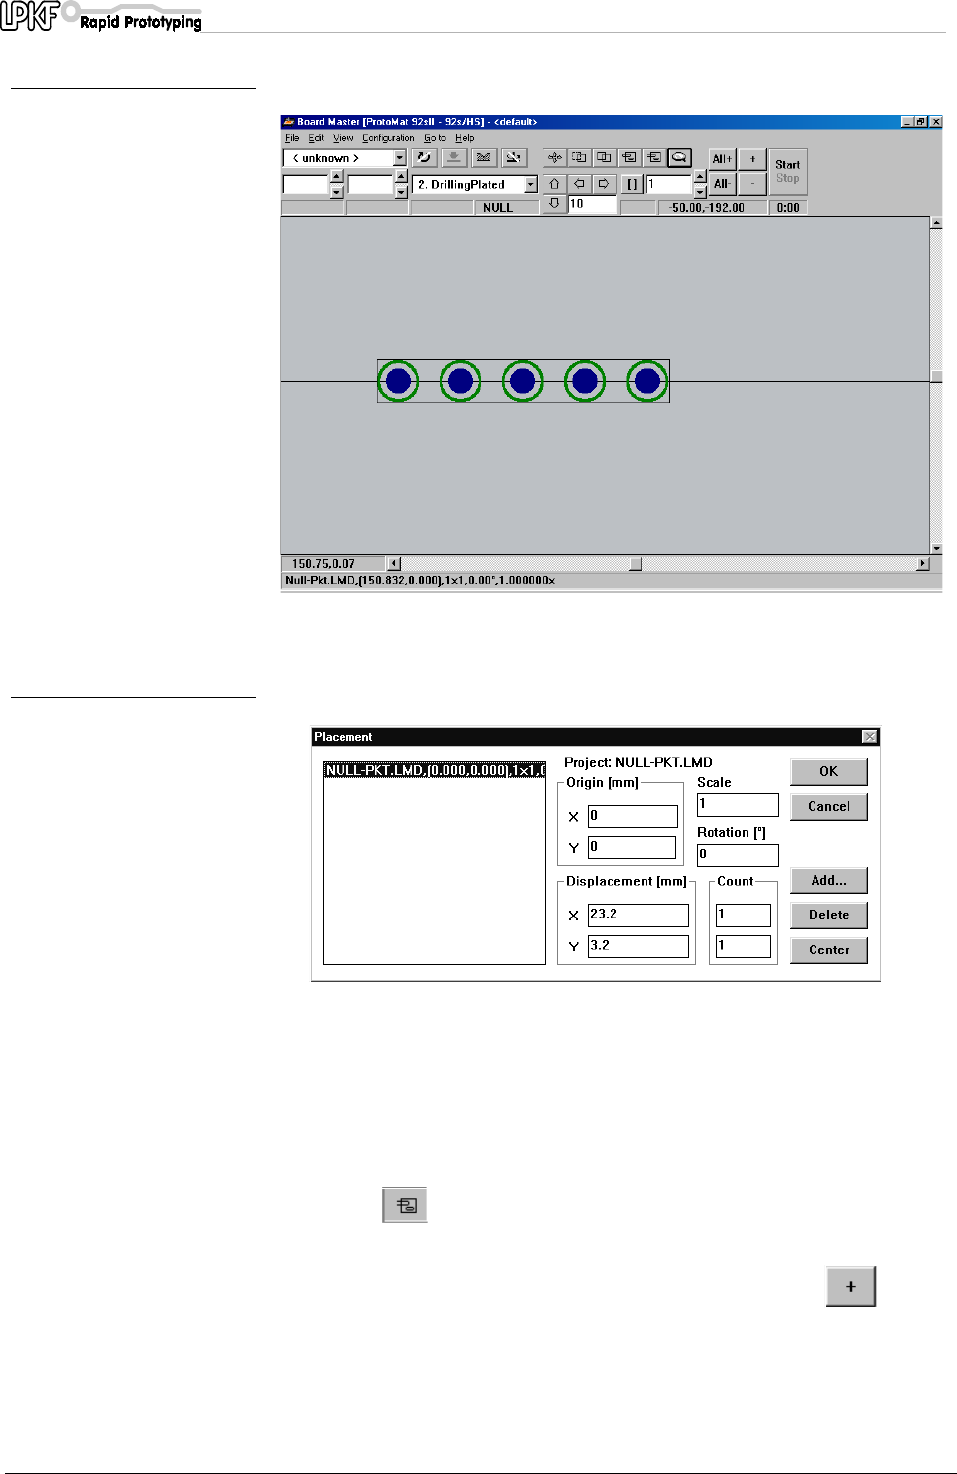
- fig. 23: 37
- fig. 24: 37
- fig. 25: 38
- BoardMaster 39
- fig. 27: 40
- fig. 28: 40
- fig. 30: 42
- fig. 31: 42
- 6.1 Tools 44
- fig. 33: Securing the board 47
- 7.4 Drilling 52
- 7.5 Isolation milling 52
- LPKF Universal, Micro and 53
- RF Cutters 53
- fig. 40: Contour Cutters 54
- 7.8 Front plate engraving 55
- 7.10 Milling layout films 56
- 7.10.1 Staining milled films 57
- 7.10.2 Removing the coating 57
- fig. 44: 58
- fig. 45: 58
- 7.12 Cleaning the PCB 59
- 8.0 Practical tips 62
- Practical tips 63
- 9.0 Appendix 64
- Appendix 65
- Default setting 65
- fig. 48: 68
- fig. 49: 68
- - Tool ring 70
- 9.7 EPROMs 73
- 95s/II circuit boards 76
- 10.1 Command structure 78
- LPKF ProtoMat 95s/II commands 79
- 10.1.2 Special commands 80
- 10.1.4 Direct commands 82
- ProtoMat 83
- 10.4 Concluding remarks 86
- Declaration of conformity 87
- 11.1 Konformitätserklärung 88
- 12.0 Index 89
Powiązane produkty i podręczniki dla Kuchenki mikrofalowe Sharp R-95STM
 (24 strony)
(21 strony)
(68 strony)
(24 strony)
(21 strony)
(68 strony)


 (24 strony) (43 strony)
(21 strony)
(36 strony)
(31 strony)
(24 strony) (43 strony)
(21 strony)
(36 strony)
(31 strony)
© 2020, manymanuals.pl. Wszelkie prawa zastrzeżone. | 0.018 s |
 Manymanuals.com
 Manymanuals.de
 Manymanuals.fr
 Manymanuals.it
 Manymanuals.pl
 Manymanuals.cz
 Manymanuals.es
 Manymanuals-pt.com
Komentarze do niniejszej Instrukcji