Sharp SF-C52 Instrukcja Obsługi
Przeglądaj online lub pobierz Instrukcja Obsługi dla Kopiarki Sharp SF-C52. Sharp SF-C52 Service manual Instrukcja obsługi
- Strona / 108
- Spis treści
- BOOKMARKI
- SERVICE MANUAL 1
- AL-2040CS 1
- VORSICHT 2
- ADVARSEL 2
- VARNING ! 2
- CONTENTS 4
- [1] GENERAL 5
- [2] SPECIFICATIONS 6
- 3. Copy performance 7
- 4. GDI Printer 8
- 5. Scan function 8
- [3] CONSUMABLE PARTS 9
- Production control 10
- 1. Appearance 11
- 2. Internal 11
- 3. Operation panel 12
- 4. Motors and solenoids 14
- 5. Sensors and switches 15
- 6. PWB unit 16
- 7. Cross sectional view 17
- 1. Copier installation 18
- 2. Cautions on handling 18
- 4. Unpacking 19
- 7. Loading paper 20
- 8. Power to copier 20
- 9. Software 20
- Before installation 20
- 11. Interface 21
- 12. Moving 22
- [6] COPY PROCESS 23
- 2. Outline of print process 24
- 3. Actual print process 24
- About DC 5.2kV 25
- Process controlling 26
- [7] OPERATIONAL DESCRIPTIONS 27
- 2. Scanner section 28
- 3. Laser unit 29
- 4. Fuser section 29
- A. General description 30
- 7. SPF section 33
- C. Operational descriptions 34
- DISASSEMBLY AND ASSEMBLY 35
- 2. Operation panel section 36
- 3. Optical section 37
- C. Assembly procedure 38
- 4. Fusing section 39
- Heater lamp 40
- B. Disassembly procedure 41
- Back Wire treatment 47
- 7. Rear frame section 48
- A. SPF motor 50
- C. Paper exit roller 51
- 10. 2nd cassette section 52
- A. Paper sensor 53
- B. Cassette detection switch 53
- C. Paper feed solenoid 53
- D. Transport roller 53
- E. Paper feed clutch 54
- F. 2nd paper feed roller 54
- [9] ADJUSTMENTS 55
- B. Image position adjustment 56
- Document guide 57
- Copy paper 57
- (A4 or 8 1/2″ × 11″) 57
- 2. Copy density adjustment 58
- 3. High voltage adjustment 59
- 4. Duplex adjustment 60
- Scale (S-D mode) 61
- Chart back surface 62
- Is there a sub 63
- code ? 63
- 2. List of simulations 64
- 3. Contents of simulations 65
- AE, main cassette lamp 76
- AE, manual paper feed lamp 76
- 4. Trouble codes 79
- [11] USER PROGRAM 82
- [12] ELECTRICAL SECTION 84
- 2. Actual wiring diagram 85
- SPF UNIT 86
- B. AL-2040CS 87
- 3. Signal name list 89
- Serial EE-PROM 93
- FlashROM VPP Controll 93
- ENG. Dept.4/DOCUMENT DIV 100
- CPWBX0205QS** 101
- AL2030/AL2040 101
- CRUM Controll 102
- OPE PWB (7SEG) 104
- LEAD-FREE SOLDER 106
- CAUTION FOR BATTERY DISPOSAL 107
- Trademark acknowledgements 108
Podsumowanie treści
Parts marked with “ ” are important for maintaining the safety of the set. Be sure to replace these parts withspecified ones for maintaining the safet
AL-2040CS CONSUMABLE PARTS 3 - 23. Production control number (lot No.) identification<Developing cartridge>∗ Destination<Drum cartridge>
5544332211D DC CB BA AAFE_DB#0AFE_DB#6AFE_DB#6VCLAFE_DB#4AFE_DB#0AFE_DB#7AFE_DB#3VCLAFE_DB#7AFE_DB#5AFE_DB#1VCLAFE_DB#4AFE_DB#2AFE_DB#5AFE_DB#3AFE_DB#
5544332211D DC CB BA AVCC3VCC3VPOUT(2)VMOUT(2)USB_IN(4)OEN(2)VPIN(2)VMIN(2)RCV(2)SUSPEND(2)(D_CONT)(4)SHARP/P.NoDWN No.TITLEISSDU.CODEMODELDATEAPPDCHK
5544332211D DC CB BA AEN5VEN5VVCC324V EN5V24VPGND/ASIC_RST(1,2,4)(CRUMSCL)CRUMSCL(1)(CRUMSDTA)CRUMSDTA(1)(CRUMSCL)TCS(7)DVSEL(7)(CRUMSDTA)TCS_AN(5)SHA
AABBCCDDEE4 43 32 21 1/STBPARAD7PARAD6/INIT/ACKBUSY/FAULTPARAD1SLCTPARAD2PARAD3/REVPARAD4/SLCTINPARAD5/AUTOFDPEPARAD0VCC3 EN5VEN5VVCC3/OA_RST(2)PARAD[
AABBCCDDEE4 43 32 21 1DRSTD-GNDONLSELIN1D-GNDKIN1SELIN3OP-STBKIN25VDRSTPSWSELIN2OP-CLKOP-DATA5VENPSLD-GNDD-GNDDRSTD-GNDKIN1KIN2SELIN3SELIN2SELIN1PSW5V
LEAD-FREE SOLDERThe PWB’s of this model employs lead-free solder. The “LF” marks indicated on the PWB’s and the Service Manual mean “Lead-Free” solder
CAUTION FOR BATTERY REPLACEMENT(Danish) ADVARSEL !Lithiumbatteri – Eksplosionsfare ved fejlagtig håndtering.Udskiftning må kun ske med batteriaf samme
COPYRIGHT © 2007 BY SHARP CORPORATIONAll rights reserved.Printed in Japan.No part of this publication may be reproduced,stored in a retrieval system,
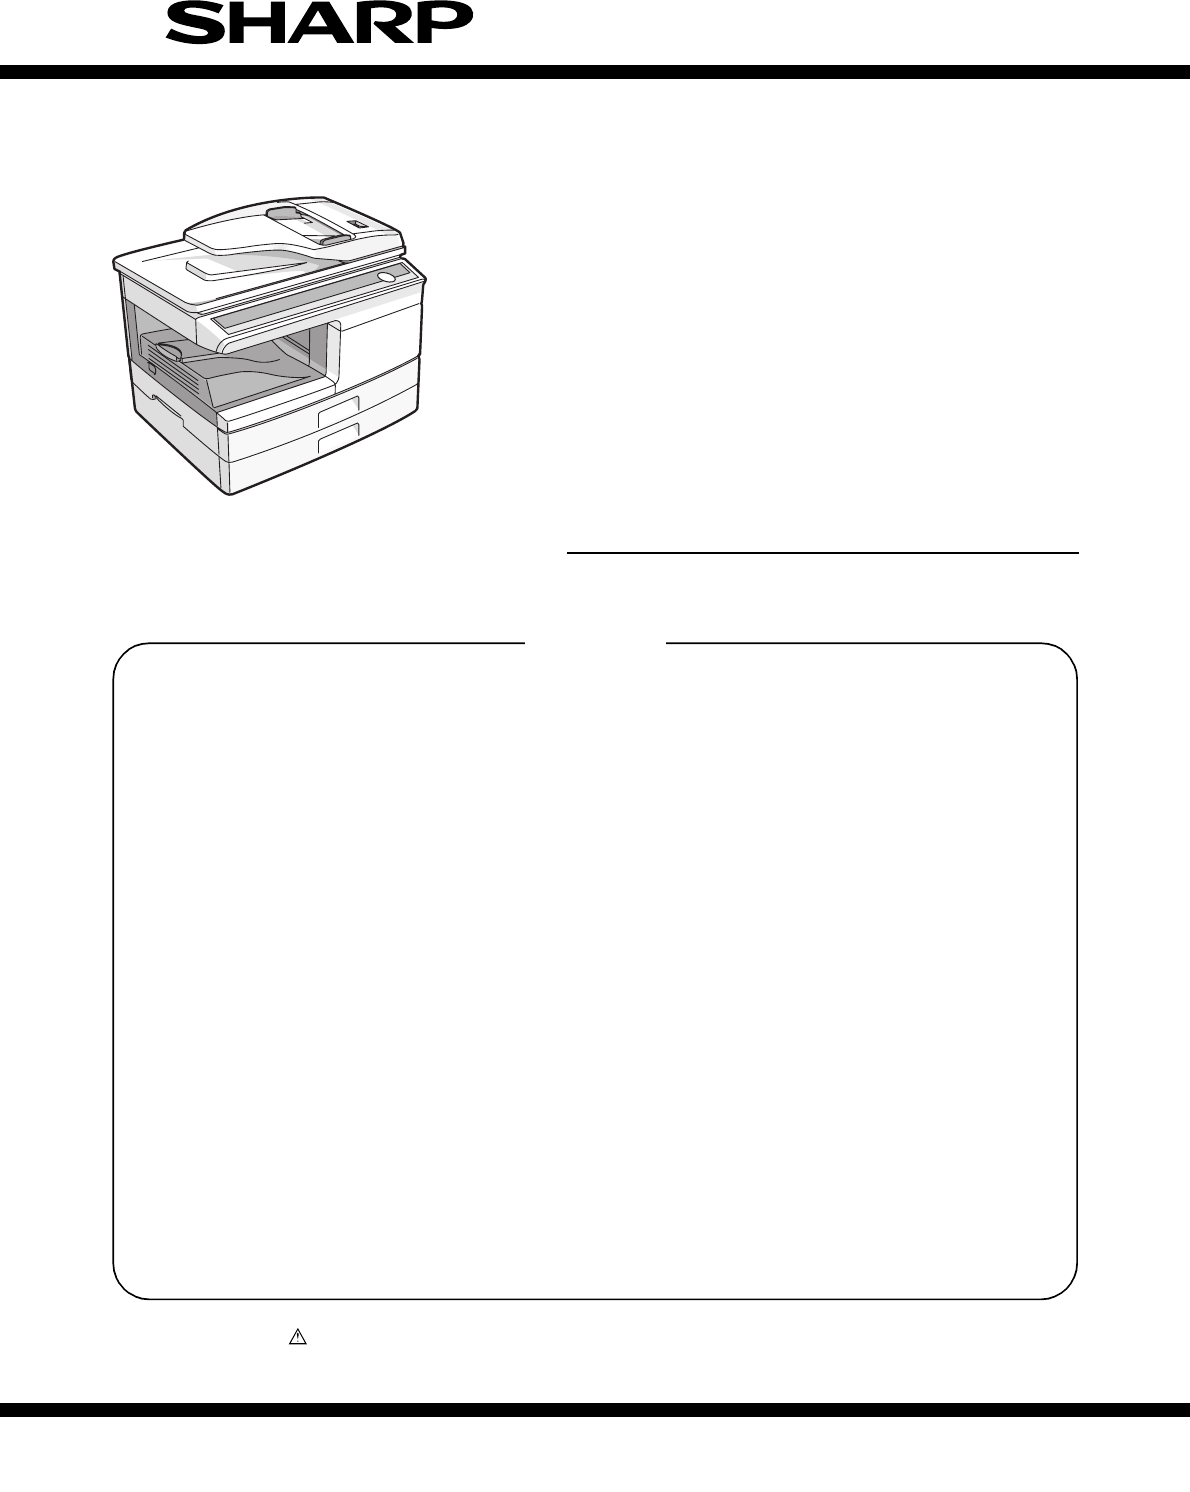
AL-2040CS EXTERNAL VIEWS AND INTERNAL STRUCTURES 4 - 1[4] EXTERNAL VIEWS AND INTERNAL STRUCTURES1. Appearance2. Internal1 Document glass 2 Operation
AL-2040CS EXTERNAL VIEWS AND INTERNAL STRUCTURES 4 - 23. Operation panel*1: Drum cartridge replacementThe useful life of the drum cartridge is appro
AL-2040CS EXTERNAL VIEWS AND INTERNAL STRUCTURES 4 - 3ONLINE indicatorThe ONLINE key is pressed and on line and off line arechanged.Power save indic
AL-2040CS EXTERNAL VIEWS AND INTERNAL STRUCTURES 4 - 44. Motors and solenoids39284157106No. Part name Control signal Function / Operation1 Main moto
AL-2040CS EXTERNAL VIEWS AND INTERNAL STRUCTURES 4 - 55. Sensors and switches1289341051167No. Name Signal Type Function Output1 Scanner unit home po
AL-2040CS EXTERNAL VIEWS AND INTERNAL STRUCTURES 4 - 66. PWB unit24583679101No. Name Function1 Exposure lamp invertor PWB Exposure lamp (CCFL) contr
AL-2040CS EXTERNAL VIEWS AND INTERNAL STRUCTURES 4 - 77. Cross sectional view345891011671213141215161718No. Part name Function and operation1 Scanne
AL-2040CS UNPACKING AND INSTALLATION 5 - 1[5] UNPACKING AND INSTALLATION1. Copier installationImproper installation may damage the copier. Please no
AL-2040CS UNPACKING AND INSTALLATION 5 - 24. UnpackingBe sure to hold the handles on both sides of the unit to unpack theunit and carry it to the in
CAUTIONThis laser radiation is not a danger to the skin, but when an exact focusing of the laser beam is achievedon the eye’s retina, there is the dan
AL-2040CS UNPACKING AND INSTALLATION 5 - 37. Loading paper1) Raise the handle of the paper tray and pull the paper tray outuntil it stops.2) Remove
AL-2040CS UNPACKING AND INSTALLATION 5 - 4*1: Compatible with Windows 98, Windows Me, Windows 2000Professional, Windows XP Professional or Windows X
AL-2040CS UNPACKING AND INSTALLATION 5 - 512. MovingMoving instructionsWhen moving the unit, follow the procedure below.Note: When moving this unit,
AL-2040CS COPY PROCESS 6 - 1[6] COPY PROCESS1. Functional diagram(Basic operation cycle)(20 microns thick)Aluminum drum Pigment layer (0.2to 0.3 mic
AL-2040CS COPY PROCESS 6 - 22. Outline of print processThis printer is a non-impact printer that uses a semiconductorlaser and electrostatic print p
AL-2040CS COPY PROCESS 6 - 3Step-3: Developing (DC bias)A bias potential is applied to the MG roller in the two componentmagnetic brush developing m
AL-2040CS COPY PROCESS 6 - 4Step-7: Optical discharge (Semiconductor laser)Before the drum rotation is stopped, the semiconductor laser isradiated o
AL-2040CS OPERATIONAL DESCRIPTIONS 7 - 1[7] OPERATIONAL DESCRIPTIONS1. Outline of operationThe outline of operation is described referring to the ba
AL-2040CS OPERATIONAL DESCRIPTIONS 7 - 22. Scanner sectionA. Scanner unitThe scanner unit in the digital copier scans images.It is composed of the o
AL-2040CS OPERATIONAL DESCRIPTIONS 7 - 33. Laser unitThe image data sent from the MCU (image process circuit) is sentto the LSU (laser unit), where
At the production line, the output powerof the scanner unit is adjusted to 0.57MILLI-WATT PLUS 20 PCTS and ismaintained constant by the operation ofth
AL-2040CS OPERATIONAL DESCRIPTIONS 7 - 4A. General descriptionGeneral block diagram (cross section)Top view(1) Heat rollerA Teflon roller is used fo
AL-2040CS OPERATIONAL DESCRIPTIONS 7 - 5(1) Cassette paper feed operation1) The figure below shows the positions of the pick-up roller, thepaper fee
AL-2040CS OPERATIONAL DESCRIPTIONS 7 - 6(2) Manual multi paper feed operation1) Before paper feed operation, the manual paper feed solenoid(MPFS) is
AL-2040CS OPERATIONAL DESCRIPTIONS 7 - 7(3) Conditions of occurrence of paper misfeeda. When the power is turned on:PPD or POD is ON when the power
AL-2040CS OPERATIONAL DESCRIPTIONS 7 - 8C. Operational descriptionsSPF JAM generation condition1) When SPPD is ON (document remaining) in initializi
AL-2040CS DISASSEMBLY AND ASSEMBLY 8 - 1[8]DISASSEMBLY AND ASSEMBLYThe disassembly and assembly procedures are described for thefollowing sections:1
AL-2040CS DISASSEMBLY AND ASSEMBLY 8 - 22) Set the charger cleaner to the transfer unit, and move it recip-rocally a few times in the direction of t
AL-2040CS DISASSEMBLY AND ASSEMBLY 8 - 33) Remove four screws, and remove the operation cabinet.4) Remove four screws, and remove the operation PWB.
AL-2040CS DISASSEMBLY AND ASSEMBLY 8 - 410) Move the carriage to the position indicated on the figure.11) Loosen the screw which is fixing the tensi
AL-2040CS DISASSEMBLY AND ASSEMBLY 8 - 54. Fusing sectionA. ListB. Disassembly procedure1) Remove the connectors (3 pcs.) of the rear cabinet.2) Ope
CONTENTS[1] GENERAL1. Major functions . . . . . . . . . . . . . . . . . . . . . . . . . . . . . . . . . . . . 1-1[2] SPECIFICATIONS1. Basic Specific
AL-2040CS DISASSEMBLY AND ASSEMBLY 8 - 67) Remove the plate spring on the right and remove the heaterlamp.8) Remove the spring, and remove the upper
AL-2040CS DISASSEMBLY AND ASSEMBLY 8 - 7Heat roller disassembly(Continued from procedure (4).)5) Remove screws, remove the fusing cover, and open th
AL-2040CS DISASSEMBLY AND ASSEMBLY 8 - 85) Remove each connector and four screws, and remove theMCU PWB.6) Remove the PWB insulation mylar and remov
AL-2040CS DISASSEMBLY AND ASSEMBLY 8 - 99) Remove the pulleys on the both sides and remove the paperexit roller.10) Pull out the paper exit roller k
AL-2040CS DISASSEMBLY AND ASSEMBLY 8 - 1014) Remove five screws and remove the main drive plate and thebelt.15) Remove the parts as shown below, and
AL-2040CS DISASSEMBLY AND ASSEMBLY 8 - 1118) Remove each pawl, and remove the paper exit tray.19) Remove two screws and remove the fusing connector.
AL-2040CS DISASSEMBLY AND ASSEMBLY 8 - 1224) Remove the screw and the connector, and remove the PPD1sensor PWB.25) Remove two E-rings and remove the
AL-2040CS DISASSEMBLY AND ASSEMBLY 8 - 132) Remove the screw and remove the side door detection unit.3) Remove three screws and remove the multi pap
AL-2040CS DISASSEMBLY AND ASSEMBLY 8 - 146) Remove the pick-up roller.7) Cut the binding band and remove the multi paper feed sole-noid.C. Assembly
AL-2040CS DISASSEMBLY AND ASSEMBLY 8 - 152) Disconnect the connector.3) Remove two screws, and remove the scanner motor.4) Remove two screws and one
AL-2040CS GENERAL 1 - 1[1] GENERAL1. Major functionsConfigurationsDescriptions of itemsCPM: Copy speed (Copies Per Minute)PPM: Print speed (Print
AL-2040CS DISASSEMBLY AND ASSEMBLY 8 - 168 Power sectionA. ListB. Disassembly procedure1) Disconnect each connector.2) Remove the screw, and remove
AL-2040CS DISASSEMBLY AND ASSEMBLY 8 - 171) Remove two screws.2) Remove the SPF motor.B. Pick-up roller, paper feed roller1) Remove two gears.1) Ope
AL-2040CS DISASSEMBLY AND ASSEMBLY 8 - 18D. Set sensor, scan front sensor1) Remove the set sensor.2) Remove the scan front sensor.3) Disconnect the
AL-2040CS DISASSEMBLY AND ASSEMBLY 8 - 191) Open the right cabinet.2) Remove three screws.3) Remove one connector from MCU.4) While tilting down the
AL-2040CS DISASSEMBLY AND ASSEMBLY 8 - 20E. Paper feed clutch1) Remove the E-ring.2) Remove the paper feed clutch.3) Remove the parts.∗ When install
AL-2040CS ADJUSTMENTS 9 - 1[9] ADJUSTMENTS1. Optical sectionA. Copy magnification ratio adjustmentThe copy magnification ratio must be adjusted in t
AL-2040CS ADJUSTMENTS 9 - 2c. Adjustment procedure1) Set the scale on the document table as shown below. (Use along scale for precise adjustment.)2)
AL-2040CS ADJUSTMENTS 9 - 3(1) Lead edge adjustment1) Set a scale to the center of the paper lead edge guide asshown below, and cover it with B4 or
AL-2040CS ADJUSTMENTS 9 - 43) Make a copy and check that the copied center line is properlypositioned.The standard value is 0 ± 2mm from the paper c
AL-2040CS ADJUSTMENTS 9 - 5(2) Perform the adjustment in each mode.1) Execute SIM 46-1.2) Select the mode to be adjusted with the exposure mode sele
AL-2040CS SPECIFICATIONS 2 - 1[2] SPECIFICATIONS1. Basic Specifications2. Operation specificationsItemType Deskto pCopy system Dry, electrostaticSeg
AL-2040CS ADJUSTMENTS 9 - 64. Duplex adjustmentA. Adjusting the paper reverse position in memory for duplex copyingThis step adjusts the front surfa
AL-2040CS ADJUSTMENTS 9 - 74) Execute SIM 50-19 to turn on the TEXT lamp and make theprinting mode in OC-D mode.Make a copy of the test chart to che
AL-2040CS ADJUSTMENTS 9 - 8<Adjustment specification>7. Automatic black level correctiona. Cases when the adjustment is required1) When the ma
AL-2040CS SIMULATION, TROUBLE CODES 10 - 1[10] SIMULATION, TROUBLE CODES1. Entering the simulation modeTo enter the serviceman simulation mode, pres
AL-2040CS SIMULATION, TROUBLE CODES 10 - 22. List of simulationsSim No.Kind ofmain codeSub codeOperation01 Optical system 01 Mirror scan operation02
AL-2040CS SIMULATION, TROUBLE CODES 10 - 33. Contents of simulationsInput method: Clear key → Exposure Select key → Clear key → Exposure Select keyM
AL-2040CS SIMULATION, TROUBLE CODES 10 - 405 03 Copy lamp ON(Operation/Procedure)When the START key is pressed, the copy lamp is lighted for 5 sec.0
AL-2040CS SIMULATION, TROUBLE CODES 10 - 522 04 JAM total counter displayThe display method is the same as the total count value display.<Display
AL-2040CS SIMULATION, TROUBLE CODES 10 - 626 03 Second cassette setup(Operation/Procedure)1. When this simulation is executed, the currently set cod
AL-2040CS SIMULATION, TROUBLE CODES 10 - 726 42 Transfer ON timing control setup(Operation/Procedure)1. When this simulation is executed, the curren
AL-2040CS SPECIFICATIONS 2 - 23. Copy performance*1: The first-copy time is measured after the power save indicator turns off following power on, us
AL-2040CS SIMULATION, TROUBLE CODES 10 - 841 07 OC cover float detection margin settingFor the number of pixels between black markers on the SPF sca
AL-2040CS SIMULATION, TROUBLE CODES 10 - 943 09 Fusing control setting for postcard-size paperWhen this simulation is executed, the currently set co
AL-2040CS SIMULATION, TROUBLE CODES 10 - 1046 01 Copy density adjustment (300dpi)Used to set the copy density in each mode.(Operating procedure)When
AL-2040CS SIMULATION, TROUBLE CODES 10 - 1146 19 Exposure mode setup<γ table setup or AE operation mode setup>When this simulation is executed
AL-2040CS SIMULATION, TROUBLE CODES 10 - 1246 30 AE limit adjustmentAE and the limit value of AE (toner save) are set.Setting is changed. When STAR
AL-2040CS SIMULATION, TROUBLE CODES 10 - 1348 01 Front/rear (main scanning) direction and scan (sub scanning) direction magnification ratio adjustme
AL-2040CS SIMULATION, TROUBLE CODES 10 - 1450 01 Lead edge image positionUsed to adjust the copy image position and the lead edge void quantity on t
AL-2040CS SIMULATION, TROUBLE CODES 10 - 1550 12 Document off-center adjustmentThe document scan off-center adjustment is performed.The adjustment m
AL-2040CS SIMULATION, TROUBLE CODES 10 - 1653 08 SPF scan position automatic adjustmentPlace three sheets of white paper so that they cover the SPF
AL-2040CS SIMULATION, TROUBLE CODES 10 - 174. Trouble codesA. Trouble codes list B. Details of trouble codes64 01 Self printPrint of one page is mad
AL-2040CS SPECIFICATIONS 2 - 34. GDI Printer*1: Engine Resolution*2: By running change5. Scan function*1: By running change6. SPFPrint speed Max. 20
AL-2040CS SIMULATION, TROUBLE CODES 10 - 18E7 11 Content Shading trouble (White correction)Detail The CCD white scan level is abnormal when the shad
AL-2040CS SIMULATION, TROUBLE CODES 10 - 19L1 00 Content Feeding is not completed within the specified time after starting feeding. (The scan head l
AL-2040CS USER PROGRAM 11 - 1[11] USER PROGRAMThe conditions of factory setting can be changed according to theuse conditions.1. Functions that can
AL-2040CS USER PROGRAM 11 - 2∗ Factory default settings are indicated with an asterisk (*).5) Press the start ( ) key. The right-hand number in the
AL-2040CS ELECTRICAL SECTION 12 - 1[12] ELECTRICAL SECTION1. Block diagramA. Overall block diagramCarriage UnitCCD PWB12V5VNFA5V 3.3VReg5VSPF MotorM
AL-2040CS ELECTRICAL SECTION 12 - 22. Actual wiring diagramA. AL-2030(1) MCU PWB (1/2)DHAI-0519QSPZ DHAI-0287QSZZ CN22 CN2 DHAI-0513QSPZ CN304 CN303
AL-2040CS ELECTRICAL SECTION 12 - 3(2) SPF unit (2/2)CN24DHAI-0532QSP1B12B-PH-K-S24VSPFMT 124VSPFMT2SPMT_03SPMT_24SPMT_15SPMT_36SPID7DGND8LEDSPID9SP
AL-2040CS ELECTRICAL SECTION 12 - 4B. AL-2040CS(1) MCU PWB (1/4)DHAI-0519QSPZ DHAI-0287QSZZCN22CN2 DHAI-0513QSPZ CN304 CN303DHAI-0270QSZZ11 11 1122
AL-2040CS ELECTRICAL SECTION 12 - 5(2) SPF unit (2/4)(3) 2nd cassette unit (3/4)(4) NIC PWB (4/4)CN24DHAI-0532QSP1B12B-PH-K-S24VSPFMT124VSPFMT2SPMT_
AL-2040CS ELECTRICAL SECTION 12 - 63. Signal name listSignal name Name Function/Operation SectionLEDPPD2 PPD2 sensor power Fusing sectionPPD2 PPD2 s
AL-2040CS CONSUMABLE PARTS 3 - 1[3] CONSUMABLE PARTS1. Supply system tableCommon to all destinations2. EnvironmentalThe environmental conditions for
AL-2040CS ELECTRICAL SECTION 12 - 7MHPS MHPS sensor Carriage HP detection Optical section(AFE_DB5) AFE Image scan data Scanner unit section(AFE_DB6)
5544332211D DC CB BA A(SIN2)/STBY/CS3#DMT3D2ARB_INT(SPPD)/WDTOVFD7ONLARB_INT/WDTOVF/CS5SCLD6/CS2#DMT2(SIN3)SDAD4/SCANST/SCANSP#NMID2D10/STBY/CS1#D5D3/
5544332211D DC CB BA APFCLKINPFCLKOUT/INREQSYNC#AFE_DB0AFE_DB7AFE_DB4AFE_DB5AFE_DB6AFE_DB1AFE_DB2AFE_DB3/OUTACK/PCLPRO/FAXPRO/ESPRDCLK_CONT/OUTCSMM_BI
5544332211D DC CB BA AD6/HWRRAMDB14D7A17A4RAMDB5A8MAD9/HWRMAD1A5A2A7A14MAD6D0D2D8RAMDB9RAMDB13A15A3A2RAMDB3D15MAD8VPPMAD12A8A11D13D11A15VPPD3D10D14A13
5544332211D DC CB BA A/RESET#VSAMP#CCD_TG#CCD_RS#BSAMP#CCD_CP#CCD_PHI2#CCD_PHI1#ADCLK#PROTECT/RESET#AFE_SDI#AFE_SDIAFE_SDI#AFE_SDIAFE_DB#0AFE_DB#3AFE_
5544332211D DC CB BA A/PRPR#PR#VCC3VCC324VVCC3VCC35V12VPGNDINT5V12VPGNDVCC312V12V12V5V24V12V5V VCC324V12VPGND24VPGND5VVCC35VVCC3VCC312VVCC312V12VINT24
5544332211D DC CB BA APGNDPGND5V24VSPFMT24VDupMTPGNDPGND24VPGNDPGND24VSCMTPGNDPGNDPGNDPGND24VSCMTPGND5V24VDupMT5V5VPGND PGND5VPGND24VSPFMT24VOUT_A-(9)
5544332211D DC CB BA AVCC35VINT5VPGNDVCC3EN5VVCC35VPGND12V5V24VVCC3INT24VINT24V5V5V5V5VPGND5VVCC3(PD2) (4)DVSEL(12)(DRST) (4)DRST(8)PD2(9)(PPD3) (4)(C
5544332211D DC CB BA AKEYIN2#KEYIN1#KEYIN2#KEYIN1#EN5V24VINT24VPGND5VINT5VPGND5V5VEN5VPGNDHLOUT (5)/PR(5)/MC (5)/BIAS(5) /TC (5)12VIN(7)3.3VIN (7)/GRI
5544332211D DC CB BA A24VPGND5V5V24VPGND5V24V24VSPFMT24V5V5V5VVCC35VPGND24VINT24VPGND24VDupMT24VPGND24V5V24VPGNDINT5V5V/VFMCNT(5)TMB_O(6)/RRS(5)PD1(7)
Powiązane produkty i podręczniki dla Kopiarki Sharp SF-C52
 (4 strony)
(2 strony)
(8 strony)
(80 strony)
(98 strony)
(34 strony)
(4 strony)
(2 strony)
(8 strony)
(80 strony)
(98 strony)
(34 strony)
 (80 strony)
(122 strony)
(121 strony)
(96 strony)
(89 strony)
(18 strony)
(112 strony)
(66 strony)
(26 strony)
(72 strony)
(80 strony)
(122 strony)
(121 strony)
(96 strony)
(89 strony)
(18 strony)
(112 strony)
(66 strony)
(26 strony)
(72 strony)
© 2020, manymanuals.pl. Wszelkie prawa zastrzeżone. | 0.048 s |
 Manymanuals.com
 Manymanuals.de
 Manymanuals.fr
 Manymanuals.it
 Manymanuals.pl
 Manymanuals.cz
 Manymanuals.es
 Manymanuals-pt.com
Komentarze do niniejszej Instrukcji